 |
| 12 of my thickened dye circles placed together - trying out possible layouts |
I’ve been experimenting
with thickened dyes this summer and greatly enjoying the experience of
splashing colour onto the fabric.
Thickened dye is a very versatile
way of adding colour to fabric. It is
very easy to use and the results can be rather good. The basic process is very easy:
 |
| My print table during the painting process - it was a fresh dropcloth |
1.
Soda ash your
fabric
The fabric has to be prepared for dyeing (pfd), which simply means you have to
give it a good wash beforehand to rid it of any coatings. I use cotton or silk. I have used some polycotton because it was
there and it did work, it just gave a softer effect.
Soak it in a solution of soda ash and water, then leave it to dry. If you want
a very defined effect, you can give it a quick iron, but be careful not to
scorch the fabric as the soda ash makes burning occur quicker.
 |
My beautiful assistant decided to have a go too
|
2.
Make up the
thickened dye
I use Manutex, which I bought from Kemtex to thicken my dye. It is made from seaweed, so the smell can be
a bit interesting if it is left too long.
I add three heaped tablespoons per litre of water and then stir really
well. It then needs to be left for a
while to thicken up and I find that any lumps tend to dissolve during the
waiting time. At the same time I make up
the Procion dyes in a liquid form. You
can add the powder to the Manutex, I just feel I have more control and it is
safer to use them in liquid format.
When I’m ready to paint, I scoop a couple of spoons of Manutex into a yoghurt
tub and then I squirt some dye in on top.
Once mixed together, I test the colour and add more dye or Manutex if
necessary.
 |
| Painting in progress |
3.
Painting
The fun bit. You can use brushes or
squirty bottles. As I was wanting a more
general effect, I used spoons and the side of an old credit card to make my
marks. Remember, that the colour on the
bottom is the most likely to be the one that stays on the fabric.
 |
| Using an old credit card to spread the dye |
4.
Batching
As with any form of dyeing, you need to give the dye time to sink into the
fabric. I’ve always been told it is best
for it to stay damp and for that reason, I roll the painted piece up in plastic
and leave it overnight. If you are
working on a big piece, you can paint another area once the dye has dried and
then wash it out all at the same time.
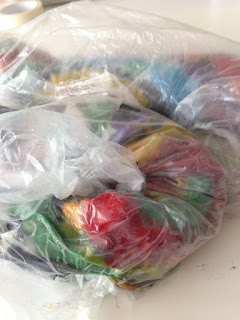 |
| Fabric batched waiting to washed out |
5.
Washing
When it is ready, I unroll the fabric into the sink and soak it in cold water,
until the water runs clear. If I’m not
intending to add more dye, I then give it a quick wash in the washing machine,
just to make sure.
 |
| A square painted, waiting to be washed |
6.
The next step
Once dried, the fabric can be used in any way, including adding more dye, or
painting. I made 30 odd of these
squares, loosely basing the design on spirals and circles. I think I’m going to piece them together and
then add more detail in stitch – hand and machine, before appliquéing some more
shapes over the top. Of course, this may
change!
 |
One of the circles after washing out. I tried to find the same one as in the photo above, but it was really hard to work out which one was which!
|
I’m running a workshop using thickened dye on 9 October - email me if you are interested in joining me.


