Monday, 28 October 2013

Inspiration: Fabric Manipulation by Ruth Singer

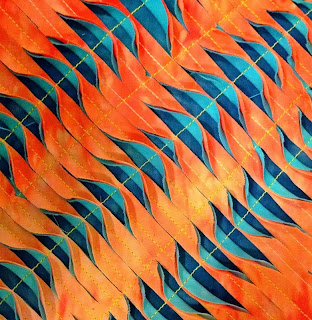
One of my samples based on Ruth's book
One of my greatest pleasures in life, alongside art, is reading.  Books have always played an important role in my life and I doubt there has been a day in almost 40 years when I haven’t had at least one book on the go.  Actually these days I’m finding it harder and harder to finish books, so I think I currently have about ten on the go...  Part of the joy of having children has been re-reading my old favourites with them and discovering new ones written more recently.  As a child, my dream job was to be a second-hand bookshop owner or a librarian, but somewhere that got lost along the route and I became an accountant and finally a very happy artist.  I wouldn’t swap my job now!

Given I read so many books on art and textiles and occasionally, technique, I thought I would share some with you on this blog now and again.  I hope you like my choices and if you have any others you think I should be reading, do let me know – I always love hearing about good books!

Fabric Manipulation, 150 creative sewing techniques
 
This book is only just out, published by David and Charles.  It is amazingly comprehensive, dividing techniques into ‘Pleat & Fold’, ‘Stitch & Gather’ and ‘Apply & Layer’, along with a basic introduction to fabric, threads, tools and stitch techniques.  Ruth encourages readers to experiment and make the techniques their own.  Although there are some small projects in the book, its aim is definitely to impart some of Ruth’s huge technical ability to start readers on their fabric manipulation journey.  That implies it is a book for beginners, it is, but there is also lots for more experienced stitchers as there cannot be many people with all these techniques in their repertoire.  Many of the techniques come with ideas for further experimentation.  In her samples, some have drawn illustrations to show how to make them as well as photographs and Ruth also gives advice of the fabrics she has used and what she thinks works well for that particular technique.
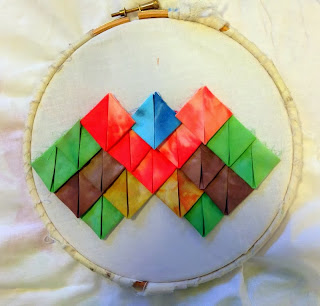
Another of my samples using folding techniques from the book
I had fun making some samples based on the book and it is also good for reminding you of things you have tried in the past but have forgotten.  It is certainly a book I will return to many times, which, in my view, makes it a very good book indeed.

Ruth runs workshops in Leicester and around the country and exhibits her work across the world.  I think it is only fair to say that I have known Ruth for a number of years and it has been a great joy to watch her work develop and take off.  She is a very hard working and talented stitch artist and teacher.  But even if I didn’t know her, this book would be high on my wish list as it is so comprehensive.

Friday, 25 October 2013

Inspiration: Pinterest Friday: Sketchbooks

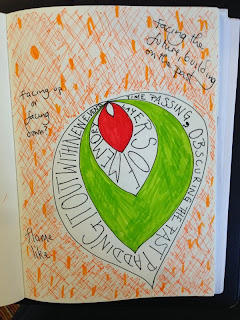
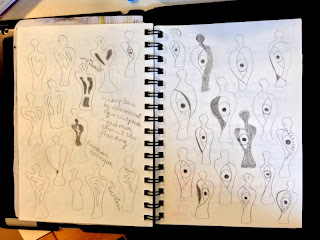
one of my current sketchbook pages, exploring memory and passing of time
Today’s Pinterest Friday is sketchbooks.  It wasn’t meant to be!  I started out with some other ideas when I went onto Pinterest today, but it was these exquisite sketchbook pages that really caught my attention, so I went with it.


I think sketchbooks cause a ridiculous amount of anxiety to artists and art students.  We all get seduced by beautiful drawings and spreads and I think the most asked questions of any course I have taught relate to how to keep a sketchbook.
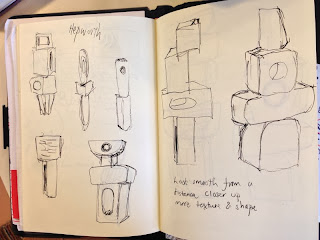
Drawing at the Yorkshire Sculpture Park - Hepworth sculptures
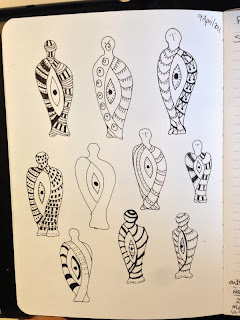
Personally, my sketchbooks are working drawings and scribbles, which mean something to me, but which are not a lot to look at.  I really struggled to find lovely spreads to share with you, especially those without lots of written comments.  Still, it was fun to look through my old sketchbooks and to recapture some of the joy I had in creating these pages, as well as recovering old ideas that might reappear in some new work soon... And my pages are real, not created to be looked at, but as part of my working process.  Sketchbooks can be an art in themselves, but I’m a textile based artist, not a sketchbook one, so I can enjoy looking at them, but not want to replicate it myself.


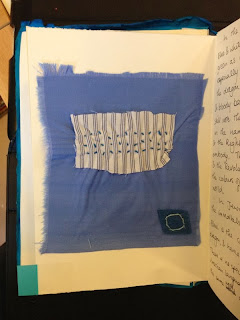
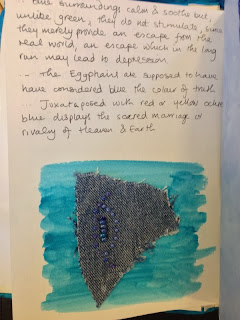
A college sketchbook page on blue

A college sketchbook page on blue

Starting ideas for Unsung Muses

Unsung Muses developed a bit further

Tuesday, 22 October 2013

Out & About: North York Moors

Scotland has very different school holidays to England and, I imagine, to the rest of the world, so last week was our ‘October week’, or half term holiday.  I believe that most of England still has a week to go.  Rather than stay at home and get depressed at all the things I need to do, but am not doing, such as tidying up, cleaning, repairing old computers etc, I took the kids down to the North York Moors for the week.  It’s an area I have never visited before and we all greatly enjoyed it.  The final count was three abbeys (Whitby, Rievaulx and Byland); two castles (Pickering and Helmsley), two fish and chip meals out, some rather nice cakes and tearooms, one return steam train journey, one run around on a beach, one folk museum (Ryedale) and lots of forest walks.  It was a lovely time, made even better when R joined us for the weekend.  And for all this activity, it was very relaxing.  Surprisingly I hardly read at all (I think I read over 10 books in our two week summer holiday...) and didn’t do much sewing.  It was more fun just cuddling the kids on the sofa in front of the TV in the evening than stitching.


Luckily the children love exploring ruins as much as I do, so they were happy running around them as I played around with the new camera settings on my phone.  We all liked making panoramas! 
I really enjoyed investigating the woods and taking close up photographs.  I’ve also pressed lots of leaves and berries into a sketchbook to see if they will colour the pages.  Fingers crossed that it doesn’t go mouldy first...


We’re all back to normal today and it is nice to be back in the studio working whilst still ignoring all the house things I need to do.

Friday, 11 October 2013

In my studio: what I didn't finish this week

On many other blogs I see lots and lots of finished work and I sometimes wonder how they get time to make it all.  My working processes are a lot, lot slower.  I can't work out whether I'm good at starting things but never quite finish them, whether I'm a slow worker or just that my work is more involved and I like having lots of things on the go.  Obviously I want to believe it is the latter!  The drawback of this is if I only posted when I had finished work, this blog would be very quiet.  So here is a glimpse of some of the things I have been working on this week.
Dyeing 
 

As the last blog post suggests I have been dyeing loads of fabric.  Partly for fun, partly for an article I am writing about fabric dyeing and partly to replenish my stock for the next batch of artwork I am planning.

Thermofax Printing

I got some screen printing inks last week and having been trying them out with my thermofax screens.  I don't know exactly where this is going to fit in, whether they become part of more complicated art or are left as 'simple' design pieces; perhaps a bit of both.

Coffee Cup Patchwork

I've also been progressing on the coffee cup patchwork - here are the first pieces stitched together.  Only another 37 to go...

Oakshott Logcabin Quilt

This quilt has been underway for ages, so I was thrilled to finally finish piecing the top and even more pleased with how it looks.  Using the shot cotton really brings the quilt to life and I just adore the colours in the Oakshott range.  I've booked into Beechwood Quilting next month to do a load of longarm quilting and this has been added to that pile.

Rail Fence Quilt

With some of the dyed fabric I have given into my desire just to have some fun making a simple quilt and have been piecing it into a rail fence pattern.  Sometimes it is lovely to do some stitching I don't really need to think about and just enjoy the process.

Sketchbook

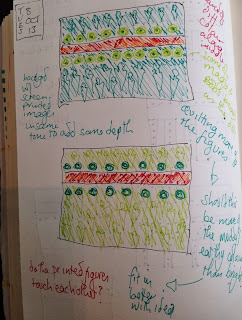
Although I don't keep a beautiful, 'proper' sketchbook, I do use a notebook and have been planning things out more and more.  These are some little thumbnails for a new piece.  I'm desperate to start, but I'm trying to be good and wait till I have some other pieces finished.

City & Guilds
This weekend, I'm teaching Patchwork and Quilting City & Guilds at the Studio, so I have been making some samples, meeting other tutors and doing some drawing for it.  It should be a good weekend.

So that's this week.  Maybe I would achieve more if I just concentrated on one thing at a time, but it wouldn't be as much fun...

Wednesday, 9 October 2013

How to: 7 steps to easy fabric dyeing

Tray of fabric dyeing
I’ve been having lots of fun dyeing fabric over the last week.  I don’t tend to follow ‘proper’ recipes and enjoy just messing around to see what effects I can get.  Here’s what I’ve been doing.

 
1.  Firstly, I’ve soaked the ‘prepared for dye’ fabric in a bucket of soda ash solution.  For fabric, I’ve actually been using pure cotton sheets from Asda.  They dye nicely and are cost effective, but I have had problems cutting them neatly afterwards (this may well be me rather than the sheet...). 
Bottles of dyes ready to be used
2.  In plastic drinks bottles, I’ve mixed the dye with water. I use Procion Cold Water dyes as no fancy equipment or heat is required.  I’ve been using a good teaspoon to almost 500ml (a pint) of water.  This bit I do in the sink with a mask on.  The powder is very fine and will stain and supposedly is carcinogenic (but most things are if you read the papers and I’m not sure how bad a substance this is, but I try not to take too many risks).

3.  The soaked fabric is then wrung out a bit and placed in a container.  I’ve been using bowls, Tupperware, cups and solid zip-lock bags.  If you want flat perfect colour, you probably need to read different instructions, but basically, the fabric needs to be able to float around, not be scrunched up and I would add the dye before the fabric.  For multi-coloured fun, I put the fabric tightly in the container and scrunch it up.
Fabric dyeing in paper cups (they leak!)
4.  Squirt the dye over the fabric.  Remember the effects of colour mixing, so don’t place complementary colours on top of each other unless you want brown.  Make sure you use a lot of dye and that it is soaking down.
Fabric dyeing in zip-lock bags
5.  After an hour or so, I top up the containers with water with some salt added to help the fixing process.  Where possible I leave the fabric overnight.

Washing out the fabric
6.  The next day, I rinse out the fabric in the sink and then bung in the washing machine with lots of colour catchers and do a light wash to get rid of any excess dye.
Using the leftover dye for a paler shade
7.  I then tend to add more fabric to the leftover dye to get paler shades of what I have already made, which can be quite useful.
Fabric hanging on the rack to dry.  Really I should have started dyeing in summer, not October
 
 
One proud six year old showing off her fabric
 Now I have lots of fabric, although my daughter has got in on the act and is secreting away the pieces she thinks are hers for her own stash, so I don’t have quite as much as I thought!
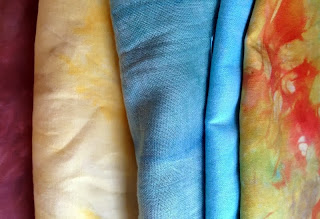
Some of the finished fabric, beautifully ironed
The big question is what to do with all this fabric?  I will be using some in my art based work shortly, but at the moment, I’m just enjoying playing around with it and making a simple quilt.  These are some of the pieces cut ready for action.
Fabric cut ready for use
Dyeing can be a science and very accurate, but I prefer a looser approach and just seeing what happens.  If I want to use plain fabric, I can buy it, whereas this stuff is more fun.


Monday, 7 October 2013

Out & About: FAB Arts Big Draw

Saturday saw our fourth Big Draw in the village.  The theme this year was ‘Drawing the Future’ and we had a number of different activities for visitors to try out.


I spent most of my time helping people dress peg dolls in clothes of the future and creating little wish houses.  I had drawn out a couple of templates of houses for people to cut out, draw on to decorate and glue together.  We also had strips of paper to write your wish for the future on, which was curled up and sealed into the house, so no one else could read it. 
It was very tempting at the end to have a sneaky peek at the wishes, but we resisted.  The little houses were all placed together to create our village of the future.  It was rather chocolate box as these were the easiest templates for me to make, but I think, in reality, most people want to live in that kind of house, rather than some challenging architect designed, difficult to live in building (though I’d love the chance to try for a while... but maybe only if it was self cleaning!).  I like watching programmes like ‘Grand Designs’ where people build their dream houses and much as  many of the appeal, I do find myself thinking but who is going to clean that glass roof?
We also finally used up my collection of milk bottle tops to make mosaic panels, which will hopefully go outside at some point.  I need to do a bit more testing to make sure that the glue will last etc.
October is the month for Big Draw events across the country and a condition of branding your event as a ‘Big Draw’ is that it has to be free.  Do check out and see if there is one near you as they are lots of fun.

Friday, 4 October 2013

Pinterest Friday: Doors

Do you find doors fascinating?  What exciting world could be contained behind them?  Doors are an ‘in-between’ place, which I think is why they are so interesting.  They hold two contradictory messages at once: entrance and exit; seen and unseen; open and closed.  This makes them a potent symbol, one which could be explored deeply in artwork, which is perhaps why I have been captivated by them for a while.


On a lighter note, I think our own doorways say so much about us, which is why I hate the message that mine gives!  We didn’t like the door or the ‘mockintosh’ pattern on the glass when we moved in.  Indeed the builders said they would break it ‘by accident’ and replace it with clear glass as my dislike was so strong.  Unfortunately, having clear glass is against building regulations, so it had to be left.  Eight and a half years later, I still haven’t got round to changing it; there are always more pressing demands on our cash (such as three growing monsters).  I would love it to be like one of these doors as they look so full of character, but unfortunately, they would look ridiculous on our modern house.  However, I can but dream. 
Pinterest is full of beautiful door images and here is the link to a small selection I have collected: Doors

Wednesday, 2 October 2013

Art with the kids: Masks

The other week with a Pinterest Friday post I showed you some of the masks I’ve been finding inspiring and how I intended to use them as a basis for a kids art lesson.  After the kids drew them at ArtWorks, the last two weeks we have been making our own versions out of fabric.
Using iron-on Vilene as the base, the kids loaded their basic shape with fabric, cut the eye and mouth holes, then stitched the mask to give it a better form.  The fabric was all donated by Snapdragon, a fabulous local business which makes lovely things sold online and on Notonthehighstreet.
The stitching bit was fun and I was kept on my toes threading endless needles!  We stitched everything using a doubled thread knotted at the end so that the needle wouldn’t fall off.  Some of the children then had time to add more details using extra fabric, ribbon and beads. 
I’m really pleased at how they turned out and it was a great final project to finish my regular contribution to ArtWorks.  For the past 3½years, I’ve spent virtually every term-time Saturday morning running the kids classes.  Much as I enjoy it, I can’t do everything and this is something I decided I could cut out, as I want to concentrate more on my own work, writing and teaching adults.  I’m still going to do the odd Saturday and am looking forward to doing some felting the next time I think.
I still find the masks inspiring and am tucking away ideas of how they may appear in my own work soon...
 
Related Posts Plugin for WordPress, Blogger...

Popular Posts